Large Tiled Floor Cleaned, Polished and Sealed in Oxted
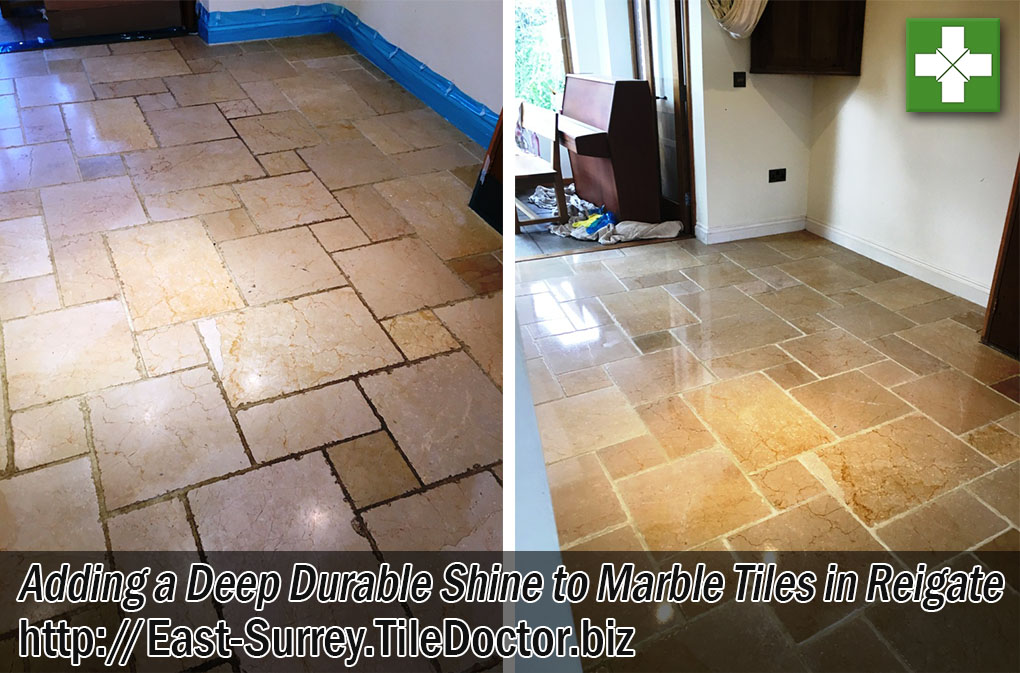
Pictured below is a large Limestone tiled floor in the Kitchen and adjacent living space at a house in Oxted. The tiles were looking quite dull, and the grout had darkened with ground in dirt so I was asked to give them a deep clean and polish to restore the beauty and character to the floor.
 |
 |
Limestone is a very tough stone so to clean the tile and rebuild the polish it needs to be polished using a set of burnishing pads which use different grades of diamond encrusted pads to cut through ingrained dirt and build up the polished appearance. Then I always recommend sealing the tiles to protect them from ingrained dirt and stains.
Secondly, it was a large extensive space and although the tiles were of a standard size it took a large number of them to fill the space resulting in what felt like miles of grout lines, all of which would need scrubbing to get them clean.
Cleaning Limestone Tile and Grout
Before working on the Limestone tiles, I decided to treat the grout to a good old-fashioned scrub with a strong solution of Tile Doctor Pro-Clean and stiff wire brush. I knew this was going to take some time so called in my son to provide some extra manpower. He’s young so can scoot around on the floor all day without feeling it later. The grout soon become much cleaner, and the soiled cleaning solution was then rinsed away with water and then extracted with a wet vacuum.
After a well-deserved, lunch we bought in a floor burnishing machine which was fitted with extra iron weights to help it get more traction on the tiles. The first step in burnishing the Limestone tiles involves the use of a coarse 400-grit pad which is designed to deep clean the stone and strip away any remaining sealer. The pad is fitted to the machine and run over each tile several times using only water to lubricate the process.
Once I’d removed any excess residue with the wet-vacuum, I changed to a medium 800-grit pad, repeated the cleaning process, and again extracted the soiled residue. This is followed by a finer 1500-grit using the same process and then finally a super fine 3000-grit pad which really brings up the polish on the tile and is applied using a small amount of water sprayed onto the stone.
By the end of the first day the floor was already looking so much cleaner and lighter.
Sealing Limestone Floor Tiles
After leaving the floor to dry off overnight I returned to the property the next day to apply the sealer. Before starting though I gave the floor a quick skim over with an old pad to make sure it was completely clean before sealing.
To seal the Limestone, I applied two coats of Tile Doctor Ultra Seal which is an impregnating sealer that soaks into the pores of the Limestone to provide durable protection against ingrained dirt without changing the natural look of the tile.
After an hour, I gave the floor a buff with a soft white pad to remove any excess sealer and further bring up the appearance of the stone. Once complete the Limestone had a nice subtle shine and the grout was back to its white colour resulting in the whole floor looking much healthier and attractive.

For aftercare maintenance of polished stone floors, I recommend the use of a cleaning product called Tile Doctor Stone Soap. It’s a gentle but effective floor cleaning product that’s safe to use on sealed floors and helps to maintain the patina on the tile. If looked after correctly this sealer should last three to four years.
Professional Maintenance of a Honed Limestone Floor Tiles in East Surrey
Large Tiled Floor Cleaned, Polished and Sealed in Oxted Read More »