East Surrey

Victorian Tiled Floor in Putney Cleaned and Sealed

Attached are photos from a Victorian tiled hallway floor I completed recently in Putney, South West London. The owner had asked if we could do anything to improve her floor because she has been renovating her house for 2 years since she bought it and had left the floor until last. She didn’t know when it was last cleaned or what products had been used, it’s handy to know a floors history when you’re cleaning it so you know what issues you might face.

Victorian Tiled Floor in Putney Before Cleaning Victorian Tiled Floor in Putney Before Cleaning

Victorian Tiled Floor Cleaning

The first step was to remove any remaining sealer and give it a good clean so I applied a solution of Tile Doctor Remove and Go mixed 50/50 with Nanotech Ultra-Clean to half the floor and left it to dwell while i brought in the rest of my equipment. These two products combine together to create an active cleaning product that can remove coatings; after an hour I then scrubbed it with a rotary machine fitted with a black scrubbing pad and clean water getting on my hand and knees with a scrubbing brush to get into the edges without damaging the skirting board. The last step was to thoroughly rinse the floor and remove any remaining cleaning products which could upset the sealer at a later stage; in fact I rinsed the floor 5 times to be sure. Once this process was complete I repeated it on the other half, I often do hallway floors in two stages so people in the building can still get around without being impacted by the work. I finished off the cleaning using any industrial steamer over the whole floor and plugged in an AirMover to assist with the floor drying before I left for the night.

Sealing Victorian Tiled Hallway

When I returned the next day I checked the floor to make sure I hadn’t missed anything when cleaning and that it was dry enough to apply a Sealer. All was well so I set about applying Tile Doctor Seal and Go which is recommend for Victorian Tiled floors and provides stain resistance along with a durable low-sheen finish. The floor took six coats and as you have to let the floor dry between each coat it took most of the day to complete. Once the last coat was dry I put the AirMover on to help dry it even more and then buffed it with a white buffing pad.

The lady was not there on completion but her mother was and was ecstatic with the result.

Victorian Tiled Floor in Putney After Cleaning and sealing Victorian Tiled Floor in Putney After Cleaning and sealing


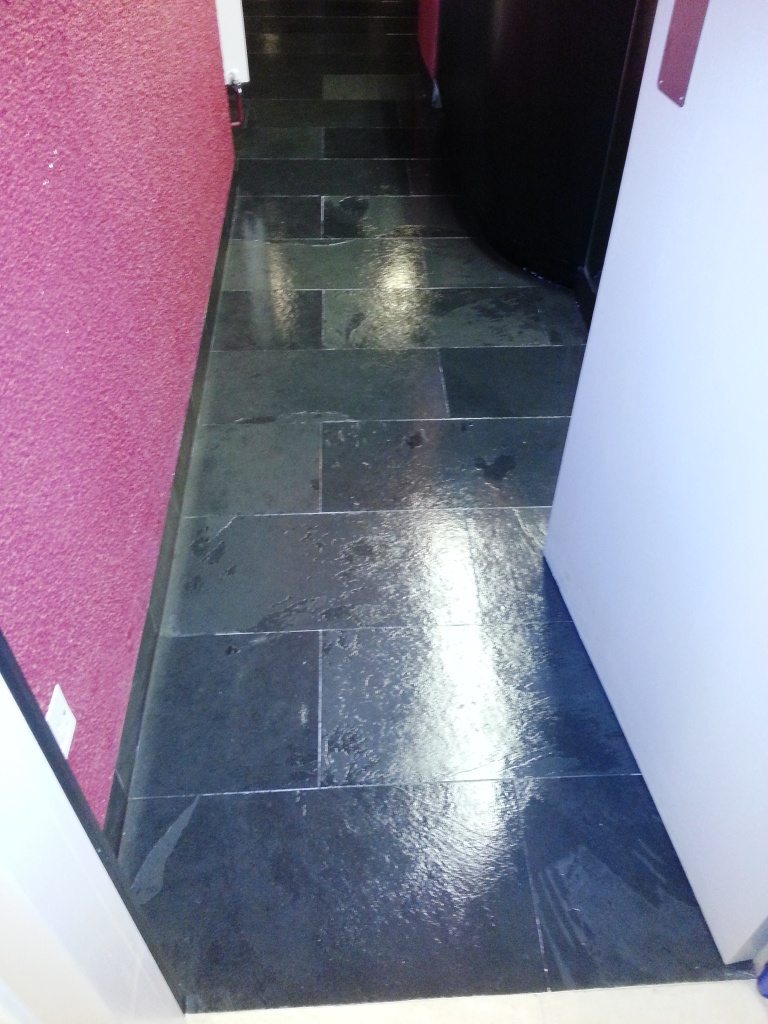
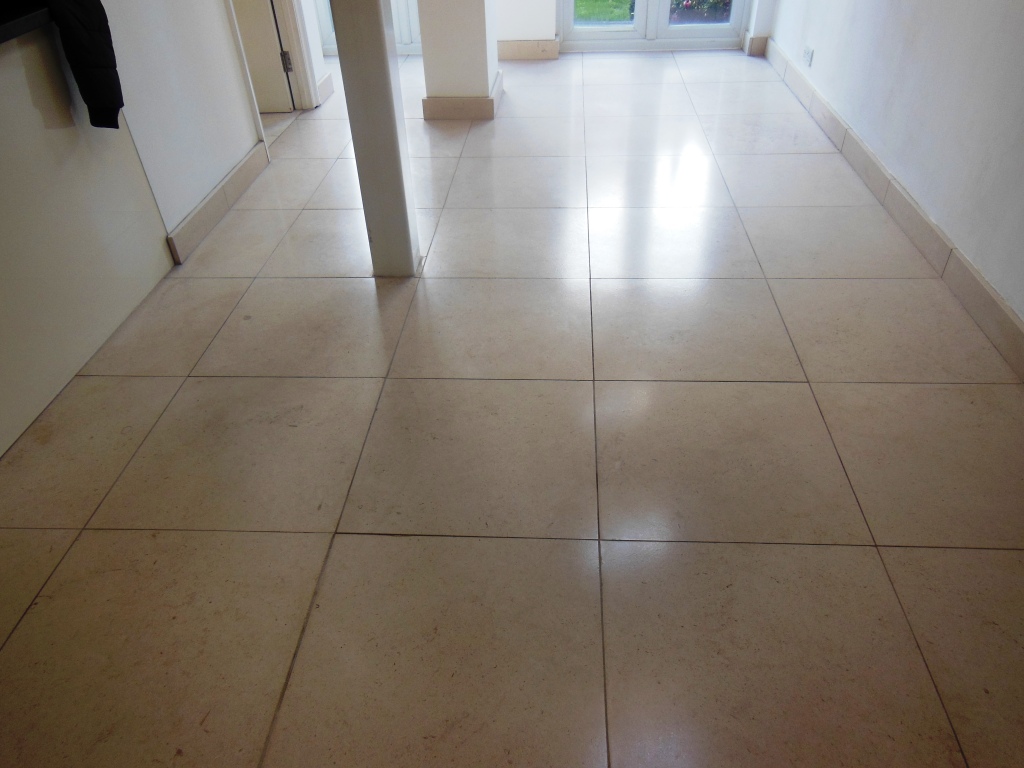
Victorian Tiled hallway floor cleaned and sealed in Putney, South London

Victorian Tiled Floor in Putney Cleaned and Sealed Read More »

Travertine Tiled Kitchen floor in Beckenham

A regular customer of mine in Beckenham was having some work done in his house and insisted the builder use my services to seal their newly laid travertine tiled floor. We do see a lot of installation problems at Tile Doctor so I can only commend his foresight.

Travertine Floor Beckenham

Cleaning Travertine Tile

Once the floor was laid I gave the Travertine tiles a thorough clean to remove dirt and grout residue using Tile Doctor Pro-Clean followed by a rinse with water. A rotary machine fitted with a scrubbing pad and wet vacuum come in very handy at this point.

Sealing Travertine Tile

When the Travertine tile was dry it was buffed up using a rotary machine fitted with a Green Twister pad before sealing with two coats of Tile Doctor Ultra-Seal which is a no-sheen penetrating sealer which gives a natural look. Once the sealer was dry it was buffed again, this time using a white buffing pad.

The builder was surprised at how well it came out and the work involved, he now recommends me to other clients.

Travertine Floor Beckenham Travertine Floor Beckenham

My customer now has me back to buff the floor on a regular basis.


New Travertine Tiled Kitchen floor in Beckenham

Travertine Tiled Kitchen floor in Beckenham Read More »

Limestone Tiled Kitchen floor in Kensington

The photographs on the page come from a house in Kensington, London which had recently been decorated. The Limestone Tiled floor was already in need of clean however to make things worse the decorators had managed to get paint splashes on the floor which they had removed using white spirit, this resulted in a patchy appearance which you should be able to make out in the photo below:

Limestone Tiled Floor Before Cleaning

Cleaning a Limestone Tiled Floor

To clean the floor we applied a solution of Tile Doctor Pro-Clean which is a heavy duty alkaline cleaning product specially designed for cleaning stone floors. This was left to dwell for a while and then agitated using a rotary machine fitted with a Black Scrubbing pad. The soiled solution was then removed using a wet vacuum and the floor was then rinsed down with fresh clean water.

Limestone Tiled Floor Polishing

We used a set of diamond encrusted Twister Burnishing Pads fitted to a rotary buffing machine to polish the Limestone floor. These pads are ideal for restoring the shine on hard stone surfaces such as Limestone and Marble, the come in a set of four and you start with the Red pad together with plain water and this cuts through and removes surface grime and any surface seal. You then progress through one by one until you get to the final Green pad which provides a high polish.

Sealing Limestone Tiles

The floor was left to dry and I returned a couple of days later to seal it using two coats of Tile Doctor Colour Grow which is a colour intensifying sealer that brings out the colours in natural stone. I carried out a water test to the customer so they could see that the floor was fully sealed; this involves placing a drop of water on the surface of the tile after each coat has dried, if the water forms a bubble on the surface then its fully sealed. The last step was to give the floor a final buff with a rotary machine fitted with a white buffing pad.

Limestone Tiled Floor After Cleaning

Customer was extremely happy because she had never seen the floor so clean.


Limestone Tile Cleaning and Polishing in Kensington, London

Limestone Tiled Kitchen floor in Kensington Read More »

Marble Tiled Floor Polish and Grout Refresh near Croydon

These photographs were taken at a house in Forestdale near Croydon in Surrey where we were engaged to clean and buff a dull Marble tiled floor; we were also asked to re-colour the grout which had become stained.

Marble Floor Before Polishing

Marble Tiled Floor Polishing

We used a set of diamond encrusted Twister Burnishing Pads fitted to a rotary buffing machine to polish the floor. The pads come in a set of four; you start with the Red pad together with plain water and this cuts through and removes surface grime and any surface seal. You then progress through one by one until you get to the final Green polishing pad which provides a high polish.

After this I mixed some Tile Doctor Shine crystallising powder with water, the Shine product provides a very high shine and tough durable finish. I used a White |Buffing pad to work the Shine powder into the tiles. After five minutes the residue was removed using a wet vacuum and I used the opposite side of the white pad and some plain water and carried on for another five minutes. Once complete I vacuumed the remaining water off and then with a clean dry white pad buffed up the floor to leave a deep lasting shine.

Recolouring the Grout

The last step was to refresh the grout using a tube of White Grout Colour applied with a toothbrush and then left for a couple of hours before using a white scrubbing pad and a little water spray to remove excess colourant. When I had finished the owner of the house said the floor looked better than it did when it was first laid.

Marble Floor After Polishing and Grout Refresh


Marble Tile Floor Polish and Grout Refresh in Forestdale, Surrey

Marble Tiled Floor Polish and Grout Refresh near Croydon Read More »

House main Pathway After Cleaning

Paving and Driveway Cleaning

Although it’s not something we do a great deal of were occasionally asked if we can clean driveways and paving. This is especially relevant for the elderly where paths can become slippery and treacherous with moss etc. if not cleaned regularly.

Cleaning Paving Stones

The requirements for this job were to clean the external paving leading up to the house and around the side. We already have the tools and products required for this work and so it’s well within our capability.

House main Pathway Before Cleaning House side Pathway Before Cleaning

The process for cleaning the pathway was really straight forward; to start with we mixed up a strong dilution of Tile Doctor Pro-Clean with water and applied that to the surface of the paving st>one. This was left to dwell for a while so the chemicals could get to work and eat into the dirt of the surface. The paving slabs where then jet washed using an industrial high pressure Jet Wash machine until we were satisfied with the results. For tough areas it’s necessary to scrub the Pro-Clean into the surface of the paving with a stiff brush to remove the soil before jet washing.

House main Pathway After Cleaning House side Pathway After Cleaning

These paving slabs were textured and offer a good grip when clean, however some slabs are very smooth and can be lethal when wet, if you have tiles of this nature then talk to us about our non etching Anti-Slip treatment.

House Steps After Cleaning
 

Cleaning Household Paving in Surrey

Paving and Driveway Cleaning Read More »

Ceramic Tile and Grout After

Soot damaged Grout cleaned and re-coloured in Warlingham

This job was completed to resolve an Insurance claim for a lady who lives in Warlingham whose bathroom tiles and grout had been damaged from smoke and soot. A building company had attempted to clean the tiles however the lady was not satisfied and told the insurance company it was to be done properly. On inspection the grout was still a bit dirty but I told her it was possible to clean it up, but could not guarantee it would be a uniform finish. I suggested that she could have the grout re-coloured at the same cost and gave her a small demonstration, she was happy with this and contacted the insurance company to get the go ahead; a week later she called me to book it in.

Ceramic Tile and Grout Before Ceramic Tile and Grout Before

Preparing the Tile and Grout for Re-colouring

When I started the job I went over it with the lady to make sure she was happy with the colour and if there were any other issues. She pointed out that on the border tiles had discoloured and on closer inspection I found that they were a marble tile and the builders had put a topcoat seal on them to make them shiny but because it was the wrong type of seal and it had started to peel.

As a result it was necessary to the sealer as so I put a coat of remove and go on the border tiles and left it to dwell; I also sprayed a solution of Tile Doctor Pro-Clean onto the ceramic wall tiles and scrubbed the tiles and grout before washing then down with warm water. By this time I could then scrub the border tiles in order to remove the old topcoat sealer. I dried the border tiles using my heat gun and the applied a coat of Ultra-Seal; the marble tiles had to be sealed before I could colour the grout.

Applying Grout Colourant

Once everything had been rinsed and the grout had dried I was able to apply the grout colourant using my colour applicator (toothbrush). Its meticulous work so it took a couple of hours to apply and by then I could go round to remove any excess colourant by spraying plain water and scrubbing with a white pad. I use a white pad, because if I used a coloured pad I could transfer the dye from the coloured pad to the seal.

Ceramic Tile and Grout After Ceramic Tile and Grout After

Once I had completed the whole room I checked to make sure everything was okay and found I needed to touch up a couple of areas. I then buffed all the tiles up and cleaned the bath, sink and floor and asked the lady to check it all before putting all my equipment and dust sheets back into the van. The lady was really happy with the result (see comment below) and has asked me to do the same work in her kitchen.

Bill worked continually throughout the day without a break. He was very polite and courteous He was full of knowledge and yes I would use again.

Kim Dehnert, Wallingham


Grout restoration in Warlingham

Soot damaged Grout cleaned and re-coloured in Warlingham Read More »

Fulham Victorian Floor After

Victorian Tiled Floor Restoration in Fulham

Details below of a Victorian tiled floor that we cleaned and sealed for a gentleman in Fulham South West London after he had refurbished his house and the workmen had left it worse for wear.

Victorian Floor Cleaning

I used a strong solution of Tile Doctor Pro-Clean diluted with hot water and applied to the floor and agitated using a rotary machine fitted with a black scrubbing pad. This worked to clean the floor and strip the existing sealer from the whole area, I then got on my hands and knees to scrub the edges and to check that all paint and glue had been removed. The soiled solution was removed using a wet vacuum and then rinsed three times before using an industrial steamer over the whole floor. This helps to neutralise and remove any products which could upset a sealer.

Fulham Victorian Floor Before Fulham Victorian Floor Before

Victorian Floor Sealing

I then left the floor to dry out and came back two days later to seal it. On my return I checked that all the chemicals had been removed and that there was no paint and muck left on the floor.

Once I was happy I then laid 6 coats of Tile Doctor Seal and Go which is an ideal sealer for Victorian tiled floors as it provides stain resistance with a low sheen finish. An industrial air mover was used to reduce drying times between coats. The last step was to buff the floor using a white buffing pad to harden the seal. The gentleman was really happy with the result and was pleased that the new tiles that had been laid as part of the renovation now blended in perfectly with the old tiles.

Fulham Victorian Floor After Fulham Victorian Floor After


Victorian Tiled floor cleaned and sealed in Fulham

Victorian Tiled Floor Restoration in Fulham Read More »

Central London Office Slate After

Slate Floor Cleaning at a Central London Office

I was asked by a building company to look at some slate flooring that was laid during a refurbishment to the offices of a German television station based in central London.
The architect was not happy because there appeared to be some grout haze and some grout along the ridges that you get in slate. I carried out a demonstration to the building manager and she was pleased with the result and we were awarded the job.

Because of the nature of the business I had to do the job out of hours, which suited me because there were 4 toilet areas to do over 6 floors and I was able to get on with the job without any interruption.

Central London Office Slate Before Central London Office Slate Before

Slate Tile Cleaning

On my arrival I laid a coating of Tile Doctor Remove and Go mixed 50/50 with NanoTech Ultra-Clean to 2 toilets and left it to dwell while I brought all my equipment in and set up. These two products together create a very powerful stripper cleaning solution ideal for the job in hand. I left the products to soak into the tiled slate floor of the first toilet for an hour before scrubbing it in using water and a hand scrubbing brush. The soiled solution was then removed using a wet vacuum and then rinsed and sprayed with Tile Doctor Grout Clean-Up to remove any remaining grout haze off the surface of the tile. The slate was the given two mores rinses with clean water before being left to dry.

Before starting on the next floor I left a mixture of Remove and Go and NanoTech Ultra-Clean to dwell on the next floor. I then carried on with this process described above until all the floors were cleaned.

Slate Tile Sealing

Once the floors were dry I put a single coat of Tile Doctor Colour Grow sealer down on each floor which is a sealer which really brings out the natural colour of the stone.
The client had requested a shiny final finish so the sealing was completed using two coats of Tile Doctor Seal and Go on each floor.

Central London Office Slate After Central London Office Slate After

When I had finished the site manager said that he couldn’t believe how nice they had come out and was looking forward to the reaction of the clients.

Cleaning and Sealing Slate in Central London Office

Slate Floor Cleaning at a Central London Office Read More »

Victorian Tiled Floor After Restoration

Victorian Tiled floor restoration in Lewisham

I’m not sure if Tile Doctor is the reason for this but there seems to have been a marked increase in the restoring of floors that have been found hidden under carpet; this particular floor was Victorian Tiles and the lady who owned the house had discovered it after lifting the carpet that had been down for 15 years and wanted to make a feature of it. The carpet had done a reasonable job of protecting it but it was dull and there were what appeared to be white paint spots on the surface.

Victorian Tiled Floor Before Restoration Victorian Tiled Floor Before Restoration

Cleaning a Victorian Tiled Floor

I started the cleaning process using a solution of Tile Doctor Nanotech Ultra-Clean which is an abrasive tile and stone cleaner mixed 50/50 with Tile Doctor Remove and Go which is a multi-purpose tile friendly stripper that can remove sealers and other coatings. The working space was quite tight so this was applied to half of the floor and left to soak in for an hour whilst I setup equipment. After an hour I scrubbed the floor using a rotary machine fitted with a black scrubbing pad and plain water. The soiled solution was then removed using a wet vacuum before repeating the process on the other half of the floor. The tiled floor was then rinsed twice thoroughly before using a steamer to clean deep into the pores of the Victorian Tile.

Sealing Victorian Tiles

The next step was to Seal the Floor but it needs to be dry first, fortunately I have an industrial airmover fan that speeds this along nicely. The floor was sealed using 5 coats of Tile Doctor Seal and Go which provides stain protection along with a low sheen finish that really brings out the beauty in Victorian Floor tiles. The transformation was quite evident and the owner has very happy with the result and left the following testimonial.

“Fab Service, Great result, Will Recommend.”

Victorian Tiled Floor After Restoration Victorian Tiled Floor After Restoration


Victorian Tiled Floor Cleaned and Sealed in Lewisham

Victorian Tiled floor restoration in Lewisham Read More »

Shower Grout Cleaning Caterham After

Tiled Shower Clean and Seal in Caterham

Shower problems must be the most common problem we come across at Tile Doctor where we often here of issues with discoloured shower tile and grout usually combined with a build up of mould. Discolouration problems tend to come from the dyes in bathroom products such as body washes and shampoo, where as mould is due to inadequate ventilation or extraction magnified by our cold damp climate as we keep the windows shut and increase insulation to reduce drafts and keep warm.

Removing Mould and Discolouration from Shower Grout

The photographs shown on this page come from a ceramic tiled shower cubicle in the Surrey town of Caterham which you may have heard of as it’s where they make the Caterham Sports Car. You should be able to see from the photographs areas of discoloration and mould on the grout and silicone sealant which unlike the glazed ceramic tiles are slightly porous and have allowed the dyes and mould to taken a hold.

Shower Grout Cleaning Caterham Before Shower Grout Cleaning Caterham Before
Shower Grout Cleaning Caterham Before

To resolve the problems with the tile and grout a strong solution of Tile Doctor Pro-Clean was mixed in a spray bottle and then sprayed on; mixing the product with air allows it to stick better onto the vertical surface otherwise gravity causes it to run off. The Pro-Clean was allowed to dwell onto the surface for a few minutes before being worked in with a grout brush. The next step was to rinse the Pro-Clean down and then re-apply the process to areas which we had missed or needed further attention.

The tile was then left to dry before replacing the silicone sealant between the tile and shower tray; whilst Tile and Grout can normally be treated once mould gets a hold on the silicone the only thing you can do is to replace it. In some cases I’ve come across the grout becomes too stained to treat and in that case the only thing you can do is scrape the top layer of grout back using a screwdriver head sized to fit into the grout line.

Shower Grout Sealing

The last step was to seal the grout for which we used Tile Doctor Pro-Seal which is a penetrating sealer rather than one that sits in the surface. The sealer should prefect staining in future however given the location it will need to be re-applied more frequently than usual.

Shower Grout Cleaning Caterham After Shower Grout Cleaning Caterham After
Shower Grout Cleaning Caterham After


Shower Tile Cleaning in Caterham, Surrey

Tiled Shower Clean and Seal in Caterham Read More »

Limestone Tile After Strip and Seal

Limestone Tiled Floor Strip and Seal in Wimbledon

Details below of a Limestone tiled floor strip and seal job we did recently for a lady in Wimbledon, South West London. It was a fairly common Limestone problem which had lost its polished appearance and was looking dull.

Stripping the Limestone Tiled Floor

To resolve we had to stripped back the Limestone surface using a set of burnishing pads, these diamond encrusted pads come in a number of different colours each one does a different job from scrubbing to polishing. I started with the red pad together with water and then carried on with the white, then yellow pads using water. Finally when I had dried the floor I used a green pad to buff the floor up. This activity took most of the day so left the floor to dry overnight.

Limestone Tiled Floor in Wimbledon Limestone Tiles in Wimbledon

Sealing the Limestone Floor

The next morning I arrived to find the floor had dried out enough for me to seal it which was done using a couple of coats of Tile Doctor Colour Grow which is a great sealer for lifting the natural colours in the Limestone floor as well as providing stain protection. Once the sealer had dried I then finished it all off with a quick buff using a white buffing pad.

Limestone Tile After Strip and Seal Limestone Tile After Strip and Seal

I’m not sure the photographs really show the difference in the floor however I can tell you that when the lady returned home from work that day she was over the moon with the transformation and wrote the following testimonial:

So pleased with the service and advice received. Prompt and Professional, My floor looks like new again. Would highly recommend and use again. Thank you.


Limestone Floor Restoration in Wimbledon

Limestone Tiled Floor Strip and Seal in Wimbledon Read More »

Victorian Floor Cleaned and partly Sealed in Richmond

Victorian Tiled Hallway Restoration in Richmond

Set of photographs here from a Victorian Tiled floor in a block of flats in Richmond Upon Thames. The floor was in the communal hallway and as a result had seen a lot of traffic and was looking very dull and in need of a good clean and re-seal.

Victorian Floor before cleaining in Richmond

Cleaning the Victorian Tiled Floor

The floor was cleaned using a dilution of Tile Doctor Pro-Clean which had been left to dwell for 20 minutes before being agitated using a rotary machine fitted with a black scrubbing pad. We use a wet vacuum to remove the dirty cleaning solution before thoroughly rinsing the floor down with clean water to remove any remaining cleaning product that might have an adverse effect on the sealer. The floor was left to dry assisted by the use of a warm air blower.

Victorian Floor Cleaned and partly Sealed in Richmond

Sealing the Victorian Tiled Floor

Having the right equipment can make light work of cleaning a large area and the blower meant we were soon looking at sealing the floor. The trouble with working in a communal area however is we had residents coming and going so we had to seal the floor in two halves. We used Tile Doctor Pro-Seal to seal the floor; it’s more expensive than some but gives a natural look whilst penetrating deeper into the tile to provide maximum stain protection, something you need in high traffic areas.

When the rest of the floor was completed and left to dry for an hour I used a rotary machine fitted with a white buffing pad to harden the floor up.

The managing agent was really pleased because she received a lot of calls from the residents to thank her as this floor hadn’t been cleaned and sealed for a lot of years.

Victorian Floor Cleaned Sealed in Richmond
 

Victorian Floor Cleaned and Sealed in Richmond Upon Thames

Victorian Tiled Hallway Restoration in Richmond Read More »

Travertine Wall Tiles After Cleaning

Travertine Wall Tile Shower Refresh in Wandsworth

These travertine wall tiles were laid in a brick pattern in a large shower cubicle in a house in Wandsworth, South London. As you can see the tiles hadn’t been cleaned for a couple of years and had become discoloured from the shampoo dyes etc, there was also some mould which is a common problem in wet areas and usually down to insufficient ventilation. The owner wanted to sell her house and was keen to get the shower looking like new again.

Cleaning Travertine Wall Tiles

We cleaned the Travertine wall tiles using a dilution of Tile Doctor Pro-Clean. It’s always best to leave Pro-Clean to dwell for a few minutes before cleaning so it can get to work on the dirt, as you would expect however liquids will simply run down a wall tile so the trick here is to apply the solution using a spray attachment; the idea behind this is to combine the product with air so it becomes lighter and sticks to the tile. Then next step is to get in with a small stiff scrubbing brush and really work the solution into the tile and grout and loosening the dirt along the way and the wash the wall down with water to remove any cleaning products.

Travertine Wall Tiles Before Cleaning Travertine Wall Tiles Before Cleaning

Sealing the Travertine Wall Tiles

The wall was wiped down and allowed to dry for before applying the sealer. There are a number of products you can use for sealing Travertine and in this case I used Tile Doctor Ultra Seal which provides stain protection without changing the appearance of the tile. The last step was to remove and replace the silicone seal between the Travertine tile and the shower tray, there was some mould build up on the original silicone which wants it gets a hold into the silicone it cannot be removed and so it’s always best to replace. At the end I had one happy customer and I think you will agree I achieved the aim of making it look like new again.

Travertine Wall Tiles After Cleaning Travertine Wall Tiles After Cleaning
Travertine Wall Tiles Finished


Wandsworth Travertine Shower Refresh

Travertine Wall Tile Shower Refresh in Wandsworth Read More »

Line Textured Slate Kensington Partly Sealed

Removing Limescale from a Slate Tiled Floor in Kensington

We were asked to look a bathroom at a flat in Kensington by a property management company; the slate tiled floor was textured with lines and the stone was affected by a number of problems including limescale and grout haze which had been partly sealed in. The owner was at the property when I arrived and I was able to demonstrate how it was possible to remove the limescale and grout haze using Tile Doctor Grout Clean-up which is an acid based product and so was given instructions to complete the job.

Line Textured Slate Kensington Before

Removing Limescale from Textured Slate

Armed with more quantities of Grout Clean-Up we were able to remove the limescale from the surface of the slate tile. The floor was then rinsed and then covered with Tile Doctor Remove and Go in order to remove the remaining sealer. We had to repeat this process twice in order to remove the grout haze that had been locked in under the sealer.

Sealing Textured Slate

After a thorough rinsing down to ensure no products remained on the floor we left it to dry and returned later to apply three coats of Tile Doctor Colour Grow which will provide future protection and as you can see from the photographs really helped to give the floors appearance..

Line Textured Slate Kensington Partly Sealed Line Textured Slate Kensington Sealed

I then explained how to clean the tiles going forward. She was extremely happy with the work carried out and also pleased with the management company for contacting us in the first place.

Removing Limescale from a Slate Tiled Floor

Removing Limescale from a Slate Tiled Floor in Kensington Read More »

Black Porcelain Floor After Photo

Putting the Shine Back on Black Porcelain Floor Tiles

We were asked to clean and seal these black Porcelain floor tiles that had been laid in a bridal shop in the Lakeside shopping centre. The shop fitters and builders had been in to setup the internal layout and the floor was looking dull and not in a presentable state good enough for the shop opening.

Black Porcelain Floor Before Photo

Cleaning black Porcelain floor tiles

We set about scrubbing the floor using a dilution of Tile Doctor Pro-Clean Tile and Grout cleaner followed by a thorough rinse. We then waited for it to dry before buffing the porcelain tile surface to a deep shine with a white buffing pad.

The floor was ready for sealing so we applied Tile Doctor Ultra Seal to a small test area but it didn’t take, not wishing to waste our time or the customers’ money we called it a day. Most porcelain tiles won’t take a sealer however some are micro porous and do need sealing so it’s always best to check.

Black Porcelain Floor After Photo
They were really pleased with result and they were even happier we were honest about not charging them for not sealing the floor; the deep shine on the floor really did look spectacular.

Black Porcelain Floor Photo
 

Restoring the Shine on Black Porcelain Floor Tiles

Putting the Shine Back on Black Porcelain Floor Tiles Read More »

Marylebone Slate After Restoration

Slate Tiled Floor in Marylebone, London

The customer was an American lady who lived in a flat in Marylebone right in the centre of London; she worked in the City and had the slate tiles in her kitchen cleaned and sealed by another company the year before and she had not been impressed with the results.

I had provided a quote and did a small demonstration on the floor to give her an idea of how the finished result would look; having been unhappy with the previous company we had to work hard to win her confidence but the demo combined with photographs and testimonials from previous work that we had done managed to assure her we could complete the job to the right standard.

Cleaning the Slate Tiled Floor

Having turned up at 7am so that she could get to work we set about scrubbing the slate tiled floor with Tile Doctor Pro-Clean and a rotary machine fitted with a black pad, we used a grout brush to clean out the grout lines and then rinsed the floor thoroughly with clean water before switching on a air blower to help the floor to dry.

Marylebone Slate Before Restoration

Sealing the Slate Tiled Floor

Once the floor was dry we proceeded to seal it with Tile Doctor Seal and Go which provides good stain protection with a low sheen finish, slate is quite porous and it took five coats before it was fully sealed.

That night I received a call from the lady thanking me for such a good job and not only was she pleased with the work but we were half the price of the original company.

Marylebone Slate After Restoration
 

Cleaning and Sealing a Slate Tiled Floor in Marylebone, London

Slate Tiled Floor in Marylebone, London Read More »

Scroll to Top