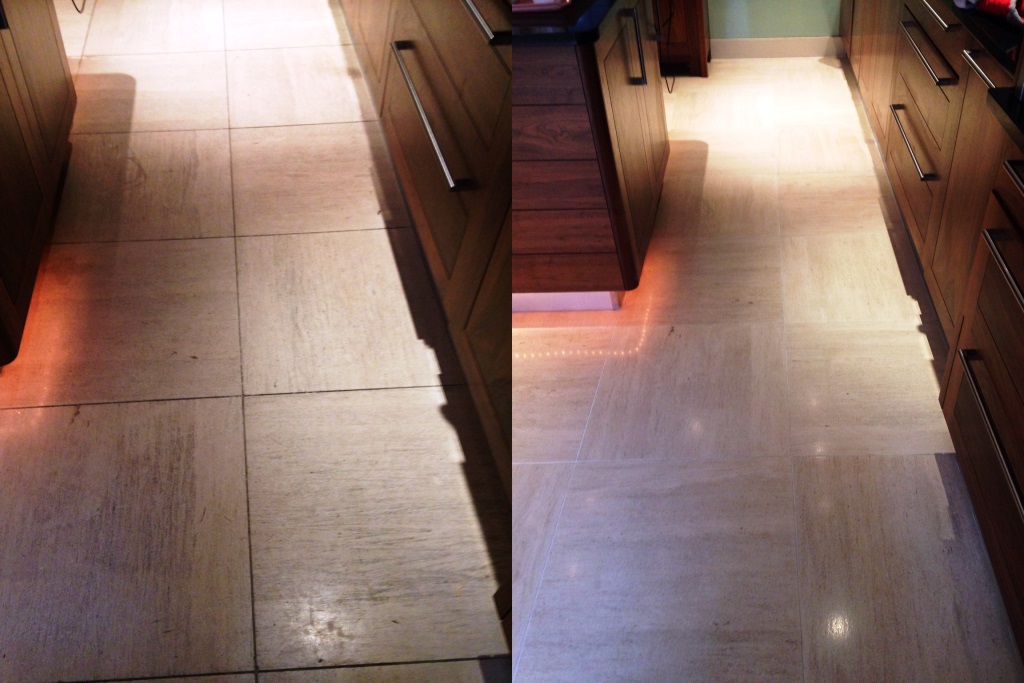
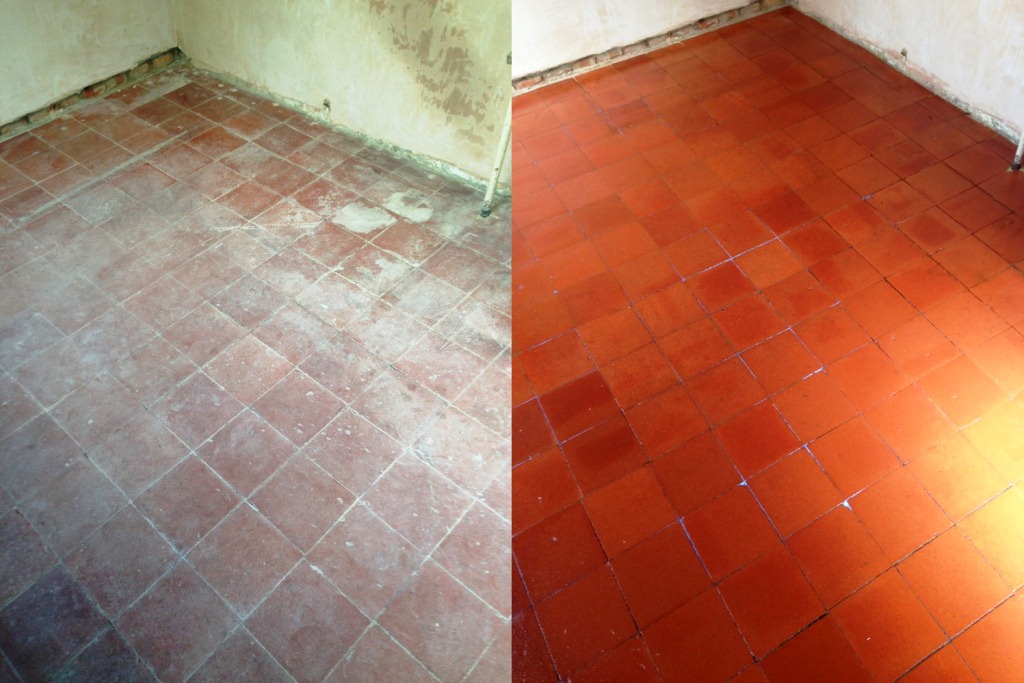
Removing wax from a Terracotta tiled floor in Battersea
Traditionally Terracotta tiled floors were protected using wax and this floor at a house in Battersea had been protected with a number of treatments including wax and other sealers, without a full history of the floor it’s not that easy to tell what you’re dealing with. Wax isn’t an ideal sealer as it can scratch easily which allows dirt to become ingrained and modern sealers outperform it in many ways.
 |
 |
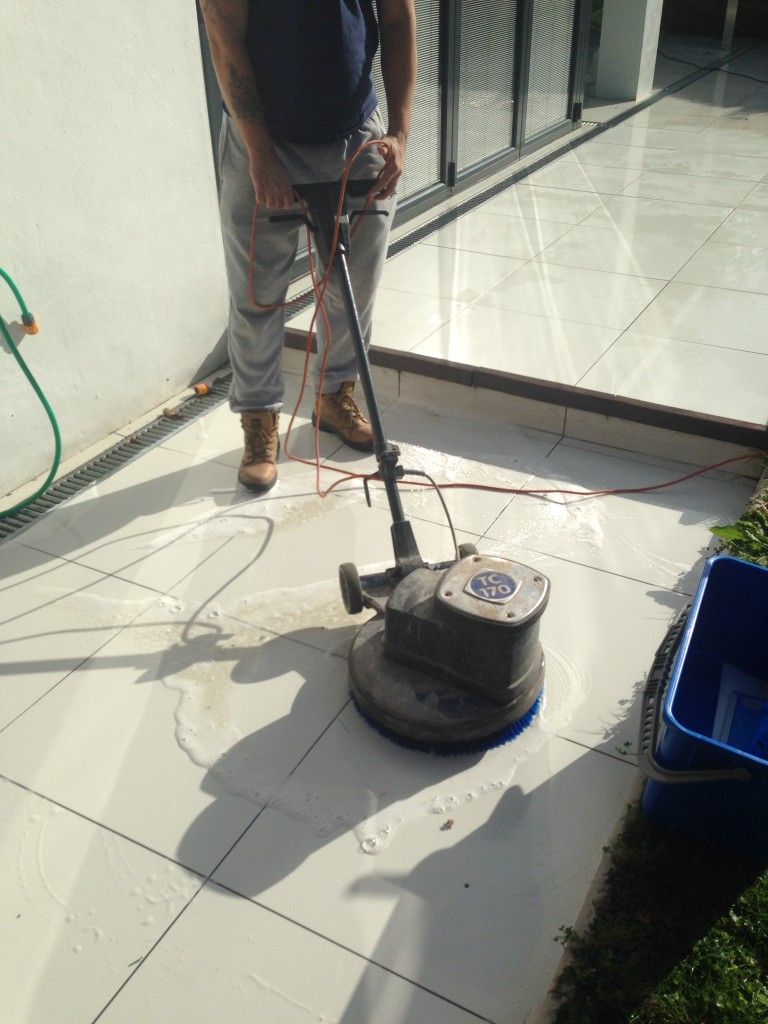
Cleaning Terracotta Tile
To get the floor clean I started the job using a strong dilution of Tile Doctor Pro-Clean which was scrubbed into the tiles using a rotary machine fitted with a scrubbing pad. Pro-Clean is a heavy duty alkaline cleaner which can be used to remove wax residues and old sealants and being an alkaline product its safe for use on tiles. Unfortunately because there was so much old sealer and wax in the tiles it took several attempts to get the tiles clean and in the end it took five days to get them back to their natural state. Once this was done the floor was given a thorough rinse to remove any trace of cleaning product and allowed left to dry.

Sealing Terracotta Tile
Tiles need to be bone dry before sealing or it will upset the final effect of the sealer and in the end I had to wait three weeks before I was happy to start sealing, Terracotta being clay based is very porous so this is not that unusual.
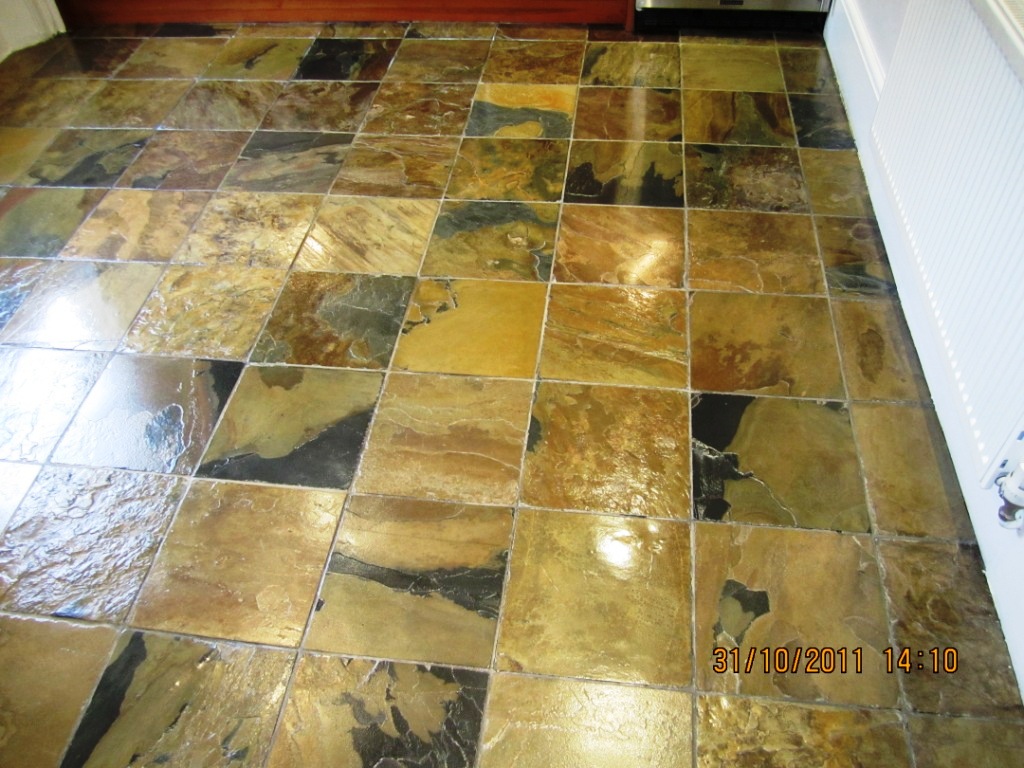
To seal the tiles I used eight coats of Tile Doctor Seal and Go which is a water based topical sealer which leaves no smell as it dries and also adds a nice sheen to the floor, eight coats is not unusual for Terracotta again due to its porosity.
 |
 |
The customer could not believe the transformation and even though it took a lot longer than first anticipated he was really pleased, especially when he got his invoice, because he was expecting to be charged for the extra time it took to complete. I told him that once I had given him my price I do not add extras.

Terracotta Floor Cleaned and Sealed in Surrey
Removing wax from a Terracotta tiled floor in Battersea Read More »