Epsom Tile Cleaning

Epsom Tile Cleaning

Welcome to my Work History archive where you will find examples of the cleaning and renovation of tiles carried out in Epsom.

Textured Ceramic Tiled Floor and Grout Cleaning Epsom

Textured Ceramic Tile and Grout Deep Cleaned in an Epsom Kitchen

I was asked to clean this ceramic tiled kitchen floor at a property in Epsom that was very dirty and needed a deep clean. As usual I called in on the property to survey the floor and provide a quote for its renovation.

Upon initial inspection I thought the tiles were actually limestone, so I did a quick test to establish that they were definitely ceramic. These were a textured ceramic tile which often gets recommended for wet areas such as kitchens due to its non-slip properties, the textured surface of the tile however does cause it to trap dirt.
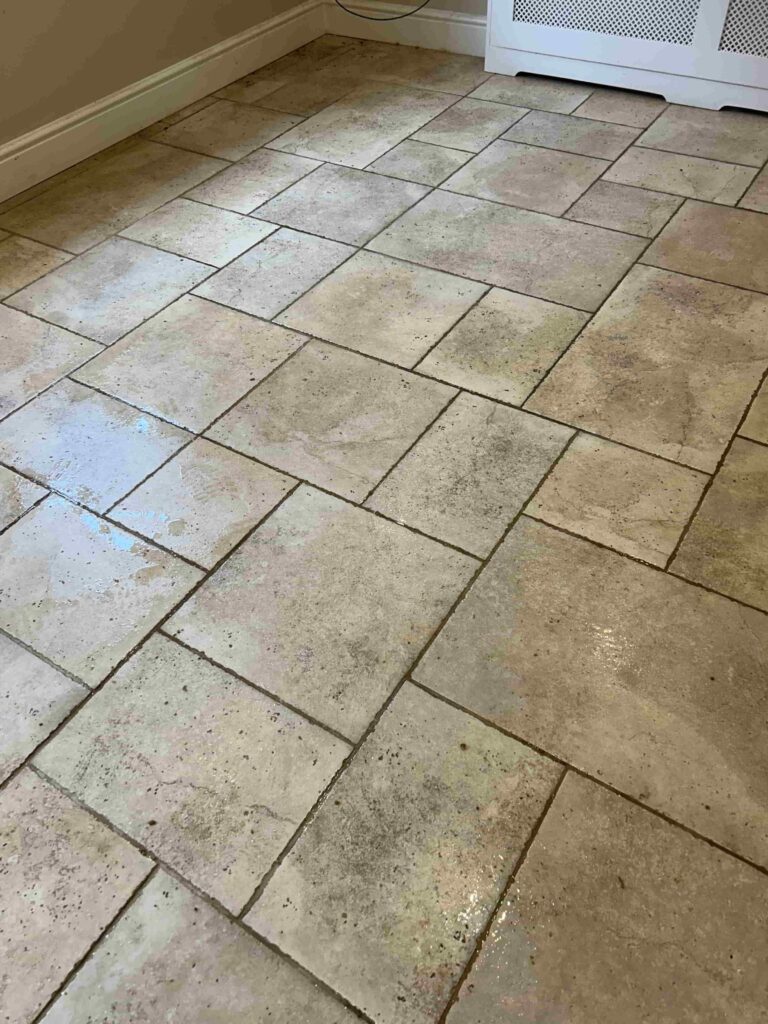
Ceramic Tiled Kitchen Floor Before Cleaning Epsom

As well as the build-up of dirt on the tiles my client also wanted the grout cleaning, which was filthy, also some of the grout had holes in it and these had filled with dirt.
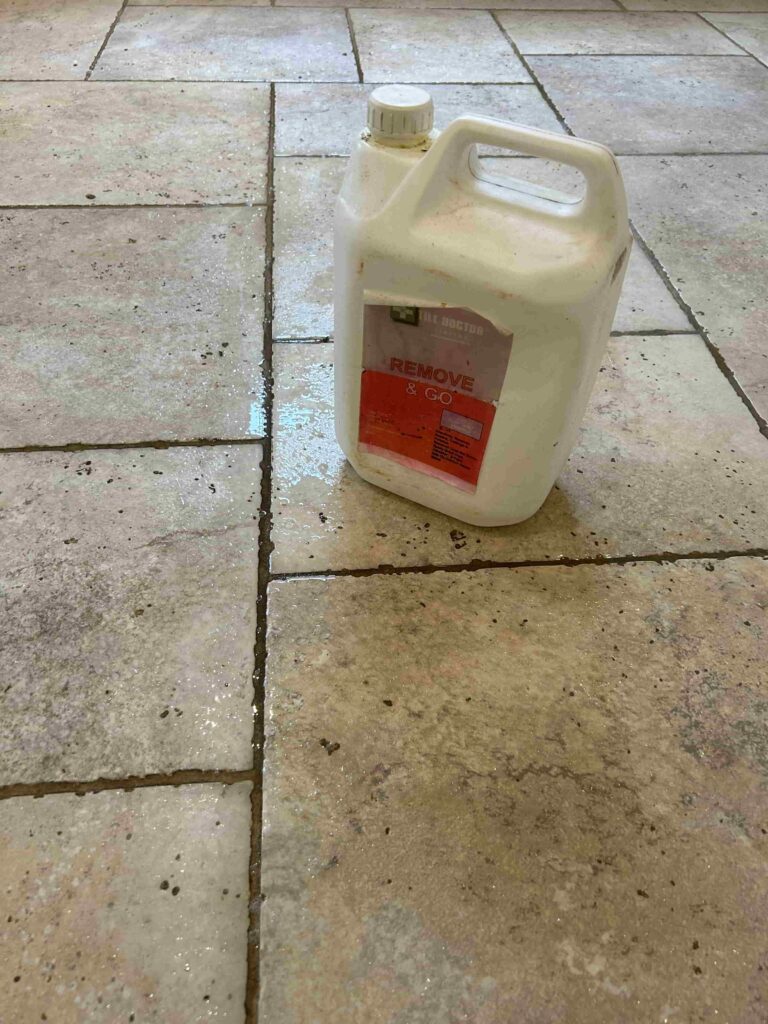
Ceramic Tiled Kitchen Floor During Cleaning Epsom

Cleaning a Ceramic Tiled Kitchen

To get the grout clean I applied a strong alkaline cleaner called Tile Doctor Remove & Go and worked it into the grout lines using a wire brush. This product is designed to remove all sorts of coatings and grime so just the thing for a dirty grout. The floor was then rinsed with water and the soiling vacuumed away with a wet vacuum.

Then as we were unable to move the furniture out of the kitchen, I had to divide the floor into three areas and scrub the Ceramic tiles with more Remove & Go. This was worked in with a rotary floor machine fitted with an aggressive carbide brush which gets deep into the annoying little holes and textured tile. Extra weights were applied to the machine to improve traction with the tile. After each section was scrubbed, the floor was rinsed and extracted as before.
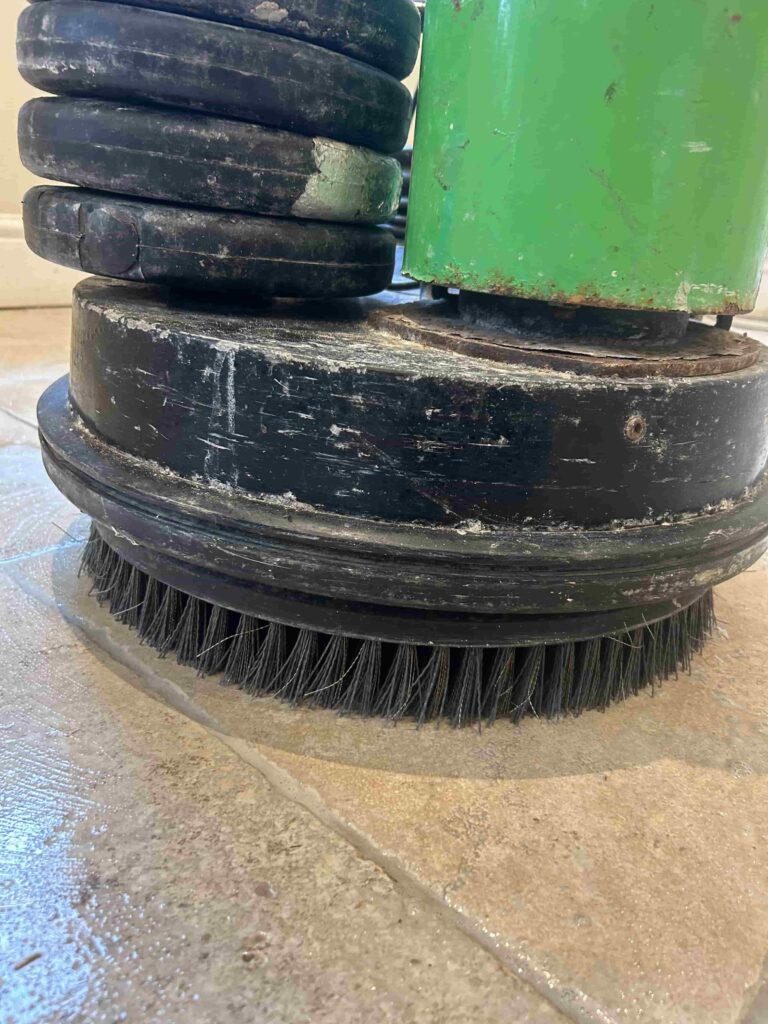
Ceramic Tiled Kitchen Floor During Cleaning Epsom

Sealing a Ceramic Tiled Kitchen

Finally, I gave the whole kitchen a rinse with warm water to remove any trace of Tile Doctor Remove & Go and dried the floor as much as possible with the wet vacuum.

Ceramic tiles won’t take a sealer as they are already sealed within the manufacturing process. Therefore, once I was happy the floor was as clean as it could be the work was done.

The work was completed in less than a day and my clients were very happy with the transformation. I think you will agree from the photographs the Ceramic tile and Grout look so much cleaner.
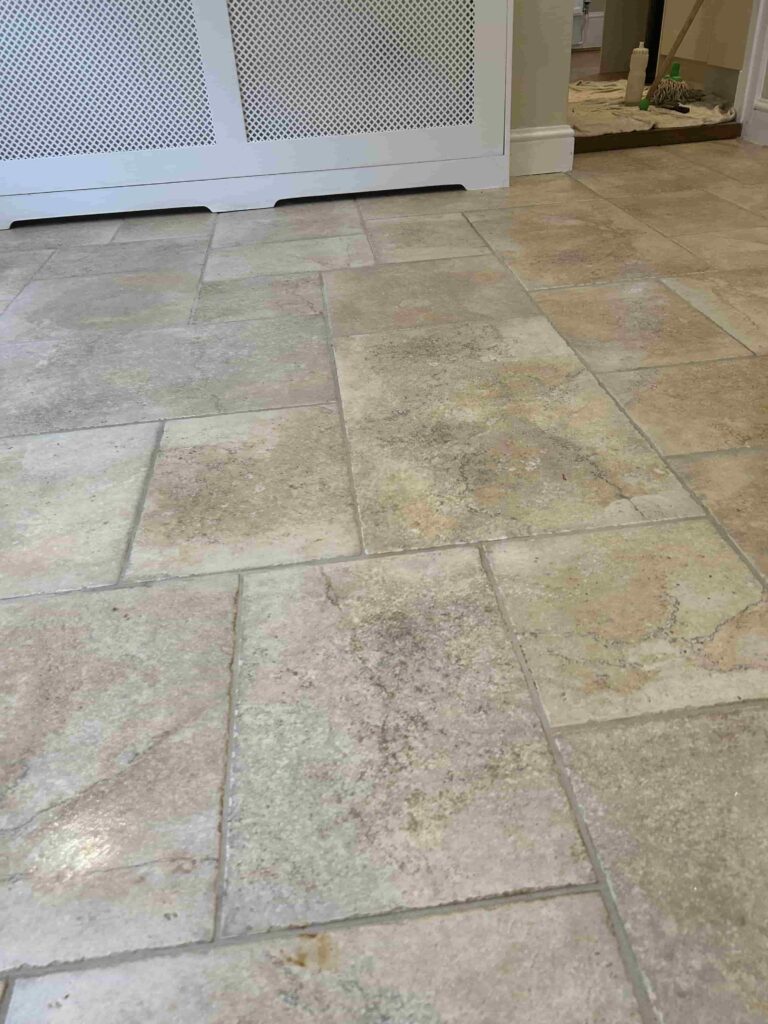
Ceramic Tiled Kitchen Floor After Cleaning Epsom


Professional Restoration of Textured Ceramic Tile and Grout in West Surrey

Textured Ceramic Tile and Grout Deep Cleaned in an Epsom Kitchen Read More »

Slate Tiled Floor Before After Maintenance Epsom

Maintaining a Slated Tiled Floor and Grout Recolouring in Epsom

I thought you might be interested to know that I have numerous clients that I visit every year to maintain the finish on their floor. We call this service “a maintenance program” and is ideal for clients who wish to maintain a deep polish on their stone which will diminish with use and over time. The example below details a recent maintenance visit to a client in Epsom who has a Slate tiled Kitchen and Conservatory floor and likes the high gloss finish of the Slate topped up every year.

Slate Floor Before Annual Maintenance Epsom Surrey Slate Floor Before Annual Maintenance Epsom Surrey

The process usually involves a basic clean and the reapplication of a fresh coat of sealer and polish. The big advantage with a maintenance plan is I know the history of the floor so there are no surprises and no need for a pre-site visit. On this occasion however my client wanted me to do something about the colour of the grout. The problem is he has three spaniels and three cats who gradually discolour the white grout with dirt. Although I clean it on each visit it was clear that the white grout was a problem and so he asked me to colour the grout in a charcoal colour to match the slate to make the problem less obvious.

Cleaning a Slate Tiled Kitchen and Conservatory Floor

Over the years I had probably applied 15 plus coats of sealer to these tiles and grout. There is no way I could paint the grout colourant on top of the sealer as it just wouldn’t adhere. To resolve this, I started by using a Fein tool with an occulting abrasive blade along the grout line. It was painstaking work but did the job of removing the sealer and ironically any dirt.

Slate Floor During Grout Maintenance Epsom Surrey Slate Floor with Cats Maintenance Epsom Surrey

I used a vacuum to clean up and then set about cleaning the floor and bringing up the polish on the Slate tiles using a 3000-grit diamond pad fitted to a rotary floor buffer. A small amount of water is squirted onto the tiles during buffing to help the process but essentially the floor is dry. Once done the Slate tiles were now ready for a new application of sealer but not the grout.

Colouring White Grout Charcoal in Epsom

For the next four hours I painstakingly painted charcoal grey grout colourant into the grout lines being careful not to touch the tiles. Grout colourant is an excellent product but dries very quickly. Any excess must be removed immediately.

Applying Charcoal Grout Colourant Epsom Surrey

Normally I recommend using a Grout Colourant Pre-Treater before applying the colourant as you get a better bond with the colourant. On this occasion however the Fein Tool had already cleaned and roughened the surface of the grout, so it wasn’t necessary.

Sealing a Slate Tiled Kitchen and Conservatory Floor

Once the grout colourant was dry, I was able to move onto the last phase of the visit and apply the sealer. The three coats of Tile Doctor Seal and Go were used to seal the floor which I find works well on Slate and as you can see from the photos gave the desired gloss effect the customer wished for. Each coat is left to dry before applying the next one.

I don’t normally recommend using a gloss effect sealer on Slate where you have pets who can scratch the tile, especially in a high traffic area such as a kitchen however he understands this but I guess he likes the shine.

Slate Floor After Maintenance Epsom Surrey Slate Floor After Maintenance Epsom Surrey


Professional Restoration of a Slate Tiled Kitchen and Conservatory in West Surrey

Maintaining a Slated Tiled Floor and Grout Recolouring in Epsom Read More »

Terracotta Patio Floor Before and After Renovation Epsom

Cleaning and Sealing a Terracotta Tiled Patio Area in Epsom

This property in Epsom featured a small enclosed Terracotta Patio which the owner wanted deep cleaning in time for the summer. She had a huge shared garden and was hoping to host a family BBQ later in in the year, so wanted it to look good for the event. Given the situation with the COVID-19 epidemic I was happy for the opportunity to work outdoors and agreed a time to pop over and take a closer look.

Small Terracotta Patio Before Cleaning Epsom

I went over to survey the Terracotta tiling and except for a few stains I could see it was in good order, however the old sealer was wearing thin and it was due a good clean and re-seal. It was roughly 18m2 and I was confident weather permitting it could be done in one day. I worked out a price which was accepted, and we agreed a date for my return.

Cleaning a Terracotta Tiled Patio Floor

Focusing on the grout first I sprayed on a medium dilution of Tile Doctor Pro-Clean, and then left it to soak in for ten minutes. The Pro-Clean was then scrubbed into the grout lines by hand using a stiff brush. This action cleaned up the grout and using minimal water the soil was rinsed off the tiles and extracted with a wet vacuum.

Having inspected the tiles on my initial visit I had decided the best course of action to remove the old sealer and clean them up would be to apply a coarse 200-grit diamond pad. This would deep clean the tiles, remove the old sealer, renovate the surface, and remove the stains. This can be a little messy but gives a great result. After the 200-grit pad I closed the pores in the tiles with a 400-grit and then 800-grit burnishing pad. Terracotta is very porous so by closing the pores it should ensure the sealer doesn’t rapidly soak into the Terracotta during sealing.

After the application of each pad the tiles were rinsed with water and the soil extracted with a wet vacuum. I used minimal water during the rinsing to improve my chances of them drying quickly so I could apply the sealer later that day.

On this occasion the tiles were in reasonable condition, however, that’s not always the case and for tougher patio cleaning work I would of used Tile Doctor Patio and Driveway cleaner which really cuts through dirt and can pretty much clean up any external patio regardless of condition.

Sealing a Terracotta Tiled Patio Floor

It was a warm June afternoon which greatly aided the drying; I know from experience that applying a sealer to a damp tile can result in an inconsistent finish so I used a damp meter to measure the moisture levels before proceeding.

My plan had worked, and the moisture reading soon reached an acceptable level allowing me to apply the sealer. The sealer I selected was Tile Doctor Seal and Go Extra, this is a tough sealer that will provide plenty of protection for many years to come and its breathable so will cope with external environment. Seal and Go Extra also contains a colour enhancer which gave the natural red colour of the Terracotta tiles a real boost.

Small Terracotta Patio After Cleaning Epsom

The patio looked great and my client was over the moon with the results. Hopefully, she won’t have to wait too long before she can have that barbeque with her family.


Professional Renovation of a Terracotta Tiled Patio in West Surrey

Cleaning and Sealing a Terracotta Tiled Patio Area in Epsom Read More »

=================================

East Surrey Tile Doctor

================================= Read More »

Scroll to Top