Esher Tile Cleaning

Esher Tile Cleaning

Welcome to my Work History archive where you will find examples of the cleaning and renovation of tiles carried out in Esher.

Soiled Victorian Path Repair Restoration Esher

Neglected Victorian Tiled Pathway Repaired and Restored in Esher

This customer in Esher requested help renovating their Victorian tiled pathway which as you can see from the photograph below was looking very neglected and in a poor state of repair. As well as some damage and missing tiles, dirt had been come ingrained and, in some places, there was vegetation growing between the tiles.

Soiled Victorian Tiled Pathway before renovation Esher

When working on external Victorian tiles like this example you really do need to have warm weather and I will often put requests for restoration work like this one on hold until the spring on summer.

Restoring a Heavily Soiled Victorian Tiled Path

To remove all the vegetation and clean up the tiles, I applied a mixture of acid-based Tile Doctor Grout Clean-up and left it to dwell and soak in for a good thirty minutes. This product removes mineral deposits from the tile and will neutralise salt problems such as efflorescence.

The solution was worked into the tiles using a rotary floor buffer fitted with a coarse 100-grit diamond pad. The industrial diamonds in the pad skim the surface of the tile exposing its original colour. All dirt is washed away and removed using a wet vacuum. The tiles were then left to dry.

While drying I carefully removed all the broken tiles with a hammer and chisel. Old Victorian tiles are super tough but often brittle so care must be taken when removing a single tile as very often the one next to it will pop out as a result some tiles should just be left where they are or you end up replacing half the path. I do have to warn customers that due to the age of the installation an “as new” result is an unrealistic expectation. These paths are often over 100 years old and are susceptible to our weather. I often tell customers they can expect some “Characterful” features once the job is done.

Once the path was cleared of debris, I set about cutting and fitting replacement tiles which I had managed to source earlier. Victorian tiles are still very popular and there are several companies in the UK where you can find a good match for your project.

Sealing a Victorian Tiled Pathway

The weather was excellent so it wasn’t long before I was able to move onto sealing the tiles with a couple of coats of Tile Doctor Colour Grow. This is a fully breathable sealer that will cope with the weather and as its name suggests it enhances the colours in the tile, the new sealer will protect the tiles for ingrained dirt going forward making the path very easy to clean. Also, the new sealer did a great job of blending in the new and replacement tiles.

Soiled Victorian Tiled Pathway after renovation Esher

Once complete the path was completely transformed and looked so much healthier. Naturally there were some “Characterful” imperfections but as I mentioned earlier this just echoes the history of the property.

For aftercare cleaning I recommended the use of Tile Doctor Neutral Tile Cleaner. Most tile cleaning products you find in supermarkets are simply too strong for the sealer and can degrade them prematurely.


Professional Victorian Tiled Pathway Floor Maintenance in Surrey

Neglected Victorian Tiled Pathway Repaired and Restored in Esher Read More »

Victorian Tiled Hallway Before and After Restoration in Esher

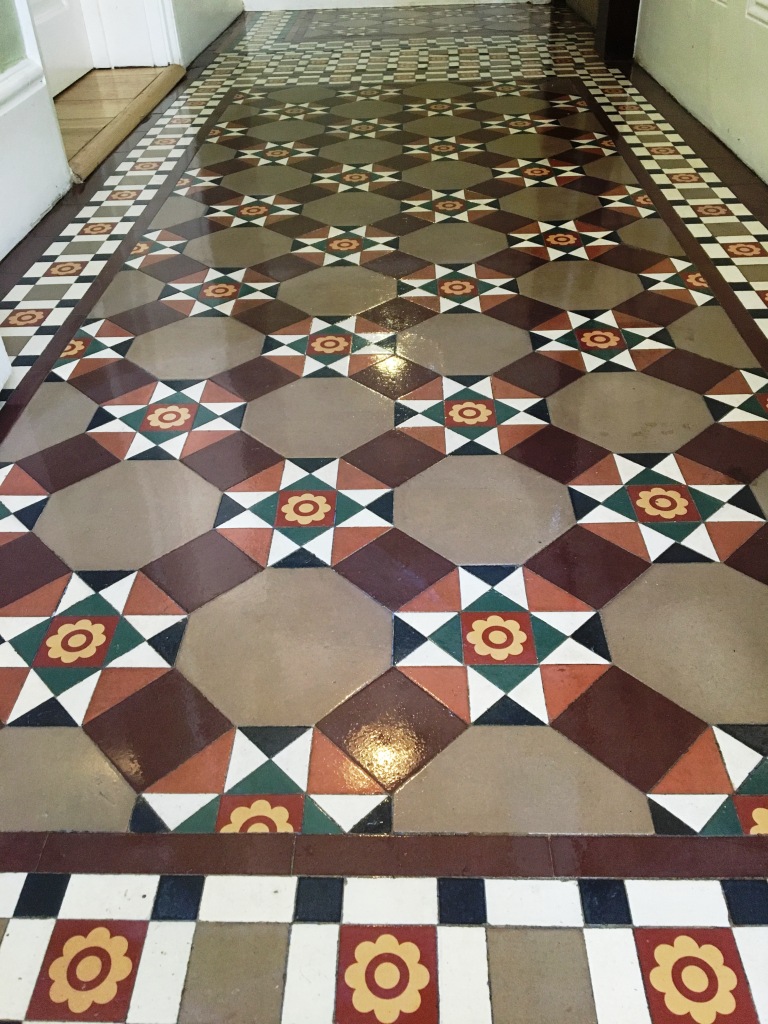
Original Victorian Tiled Hallway Brought Back to Life at an Esher Flat

Esher is a small suburb in Surrey, situated just outside London. It was a fashionable area to live in amongst royalty and the aristocracy in the Victorian period, and during this time many buildings were built.

One such building has since been turned into a block of separate flats, and some of the flats still contain the original Victorian tiles in the hallway. I was contacted by one of these flat owners about restoring their tiles back to the best possible condition. Interestingly this customer’s tiles were part of a larger floor that had been divided between two flats.

Victorian Floor Tile Before Cleaning Esher

Cleaning Original Victorian Tiles

I began the restoration by spreading Tile Doctor Remove and Go across the entire set of tiles. Remove and Go is a heavy-duty stripper that helped to loosen and remove old glue deposits where carpet had been laid over the tile, it will also strip off old sealers and release ingrained muck.

The Remove and Go was worked into the tile and grout with a stiff brush and then the soiled solution rinsed off and extracted using a wet vacuum. I followed by this applying a coarse 200-grit diamond encrusted burnishing pad, fitted to a handheld buffer, to grind away the particularly stubborn dirt and stains to restore the appearance of the stone. Afterwards, I rinsed the tiles again with water and soaked up the resultant slurry with a wet vacuum.

I noticed that there remained several ingrained stains dotted across the floor, so to remove these I aggressively burnished the affected areas with a very coarse 50-grit handheld diamond block. This essentially removed the very top layer of the stone, taking with it the ingrained marks.

Next, I dried the area with a large blower and heat gun. Under normal circumstances, 48 hours needs to pass before the tiles can be sealed, but as this was a small area I was able to dry it very quickly. After carrying out a damp test, I determined the tiles were ready to be sealed.

Sealing Original Victorian Tiles

To seal the Victorian Tiles, I applied six coats of Tile Doctor Seal and Go sealer, which provides a high-quality sheen finish, as well as plenty of protection for the future. Tile Doctor have a range of suitable sealers available including Colour Grow which provides a matte finish – it’s just a matter of personal choice for the customer.

Victorian Floor Tile After Cleaning Esher
The outcome of the restoration was fantastic and the customer was very pleased, leaving the following testimonial.

“Promptly organised, delivered when promised. Good looking job when complete. Well done.”

Professional Tile Cleaning and Sealing for an Original Victorian Tiled Floor Restoration in Esher

Original Victorian Tiled Hallway Brought Back to Life at an Esher Flat Read More »

Large Area of Limestone Tiled Flooring Burnished in Esher

Large Area of Limestone Tiled Flooring Burnished in Esher

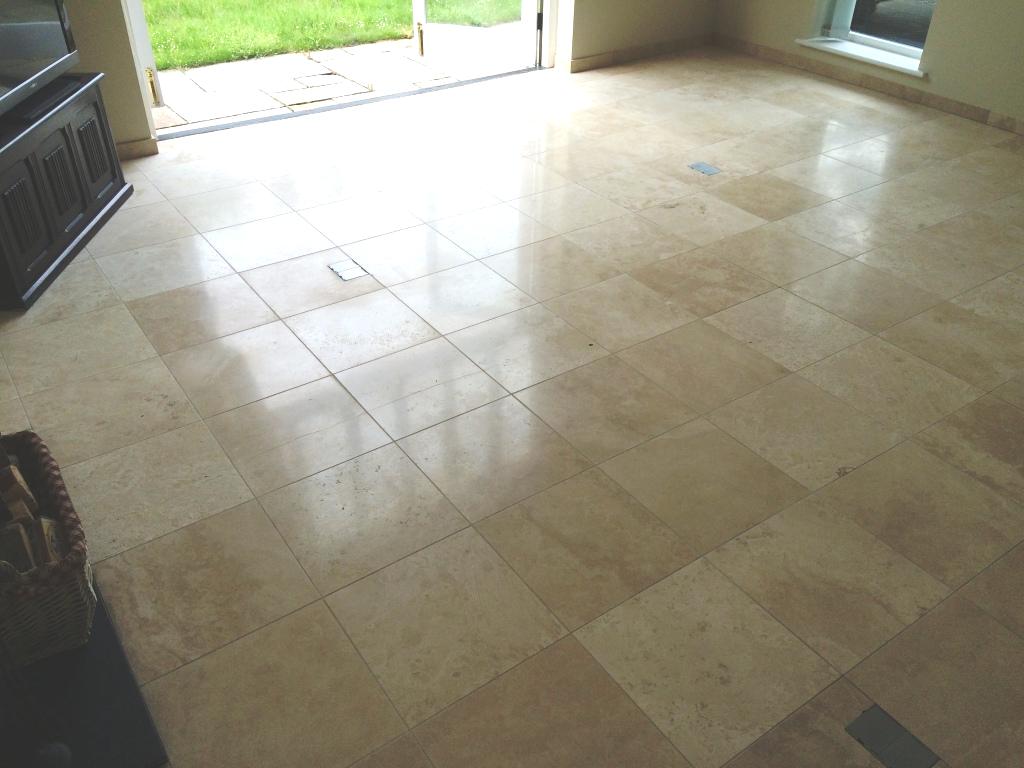
This beautiful Limestone tiled floor was installed in the lounge of a house in the popular London commuter town of Esher. The floor was looking dull after years without a polish and the grout was dirty, there was also a crack running along a number of tiles however without matching replacements it was decided not to address that problem at this time.

Limestone Tiled Floor Before Cleaning and Polishing in Esher
Limestone is a very tough stone so to clean the tile and rebuild the polish it would need to be burnished using different grades of Diamond encrusted pads and then sealed to protect it from ingrained dirt and stains. It’s worth noting that polished stone tile does need to be regularly maintained if you want to keep up its appearance and Tile Doctor does offer this as a service.

Limestone Tiled Floor Before Cleaning and Polishing in Esher

Cleaning Limestone Tile and Grout

Before working on the tiles I decided to treat the grout to a good old fashioned scrub with a strong solution of Tile Doctor Pro-Clean and stiff grout brush. This soon got the grout clean and the soiled cleaning solution was then rinsed away with water and then extracted with a wet vacuum.

Next step was to start the burnishing process using a coarse pad which was attached to a rotary buffer and then, using a litre of water per square metre as lubrication, I cleaned and stripped away any remaining sealer.

Once I’d removed any excess residue with the wet-vacuum, I changed to the a medium grit pad, repeated the cleaning process, and again extracted the soiled residue. Finally, I completed the process once more with the fine grit pad. Once this was completed I buffed the floor with a soft white pad to clean up any dried residue, leaving it ready to be sealed.

Sealing Limestone Tiles

Two days later, once the floor was completely dry, I returned to the property to seal and polish the floor. To begin, I restored the shine to the tiles by applying the last of the four burnishing pads – the very fine grit pad.

To seal the Limestone I applied Tile Doctor Ultra Seal which is an impregnating sealer that soaks into the pores of the Limestone to provide durable protection against ingrained dirt without changing the natural look of the tile.

After an hour, the floor was ready to be buffered once again to bring up the shine and then we were done

Limestone Tiled Floor After Cleaning and Polishing in Esher
I was very pleased with the result and more importantly so did the customer who left the following feedback

“All work very professionally carried out, floors are sparkling.”

Limestone Tiled Floor After Cleaning and Polishing in Esher
 

Professional Maintenance of a Honed Limestone Floor in East Sussex

Large Area of Limestone Tiled Flooring Burnished in Esher Read More »

=================================

East Surrey Tile Doctor

================================= Read More »

Scroll to Top